
How to Draw the Eye: Step-by-Step Guide for Beginners (2026)
Learn how to draw the eye with this simple step-by-step guide. Discover eye anatomy, shading techniques, common mistakes, and pro tips for realistic eye drawings.
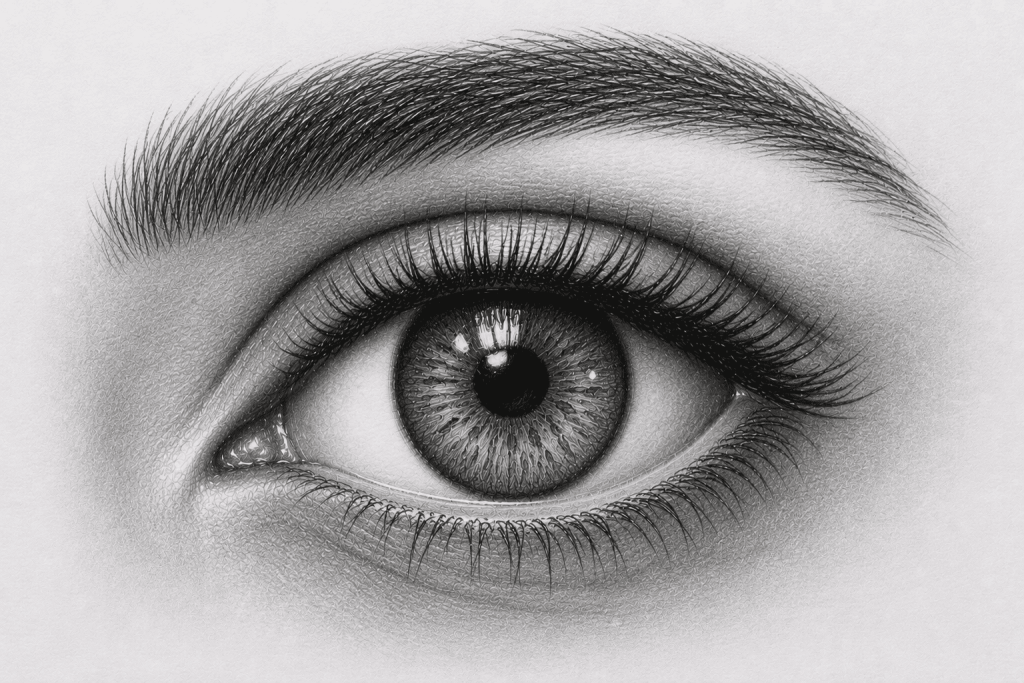
How to Draw the Eye: A Complete Beginner’s Guide
Learning how to draw the eye can feel intimidating at first. Eyes contain many small details, and even a tiny mistake can make a drawing look unnatural.
The good news is that drawing realistic eyes becomes much easier when you understand the basic structure behind them.
In this guide, you’ll learn:
- How to draw the eye step by step
- Basic eye anatomy for artists
- Simple shading techniques
- Common mistakes beginners make
- Tips for drawing realistic eyes
Let’s start with the foundation.
Understanding Eye Structure Before You Draw
Many beginners immediately focus on eyelashes, pupils, and reflections.
Professional artists do the opposite.
Before drawing details, understand the main structures:
- Eye socket
- Eyelids
- Eyeball
- Iris
- Pupil
- Eyelashes
Think of the eye as a sphere sitting inside a socket. The eyelids wrap around that sphere.
Once you understand this concept, drawing realistic eyes becomes much easier.
Materials You Need
You don’t need expensive supplies.
A simple setup works perfectly:
- HB Pencil
- 2B Pencil
- Eraser
- Drawing Paper
- Blending Stump (Optional)
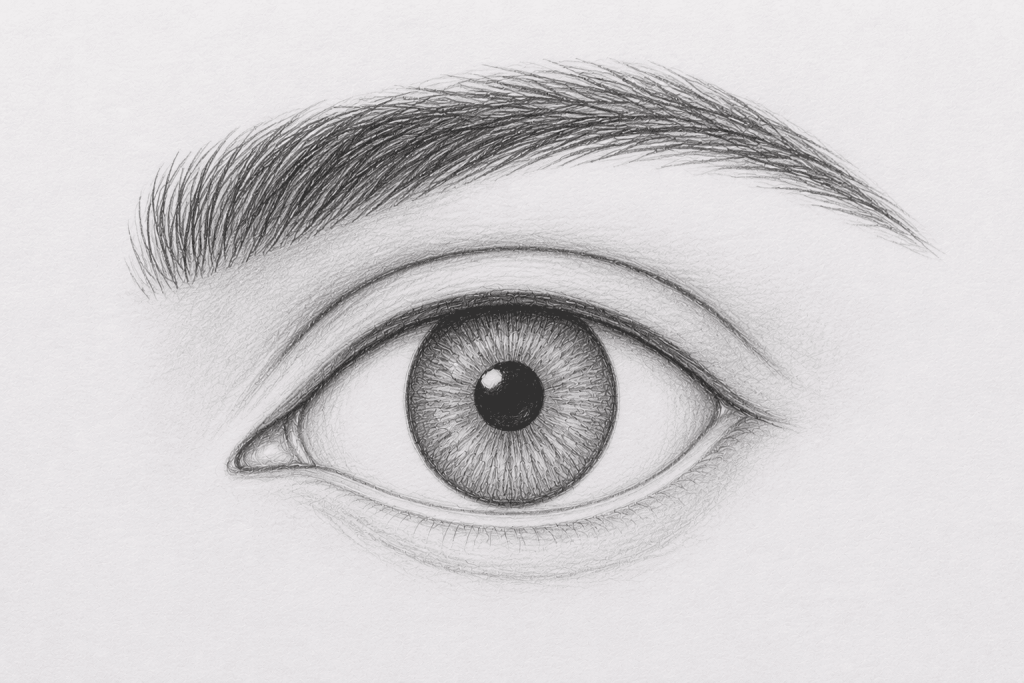
Step 1: Draw the Basic Eye Shape
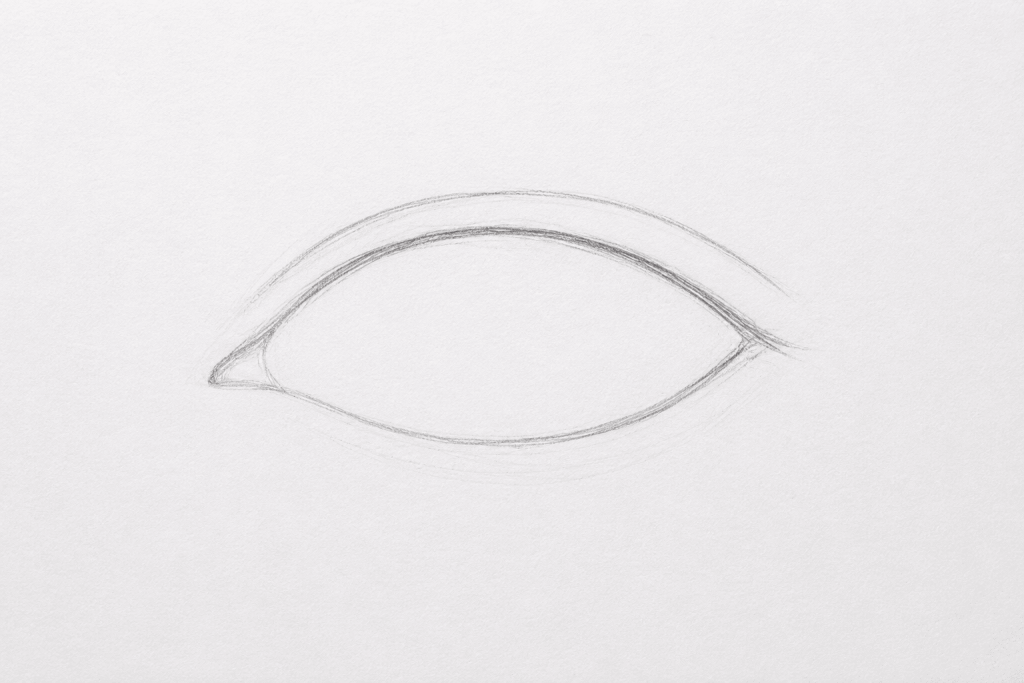
Start with a light sketch.
Avoid drawing a football-shaped eye.
Instead:
- Draw a slightly curved upper eyelid.
- Add a flatter lower eyelid.
- Leave space for the tear duct.
Keep your lines loose and light.
At this stage, focus on proportions rather than details.
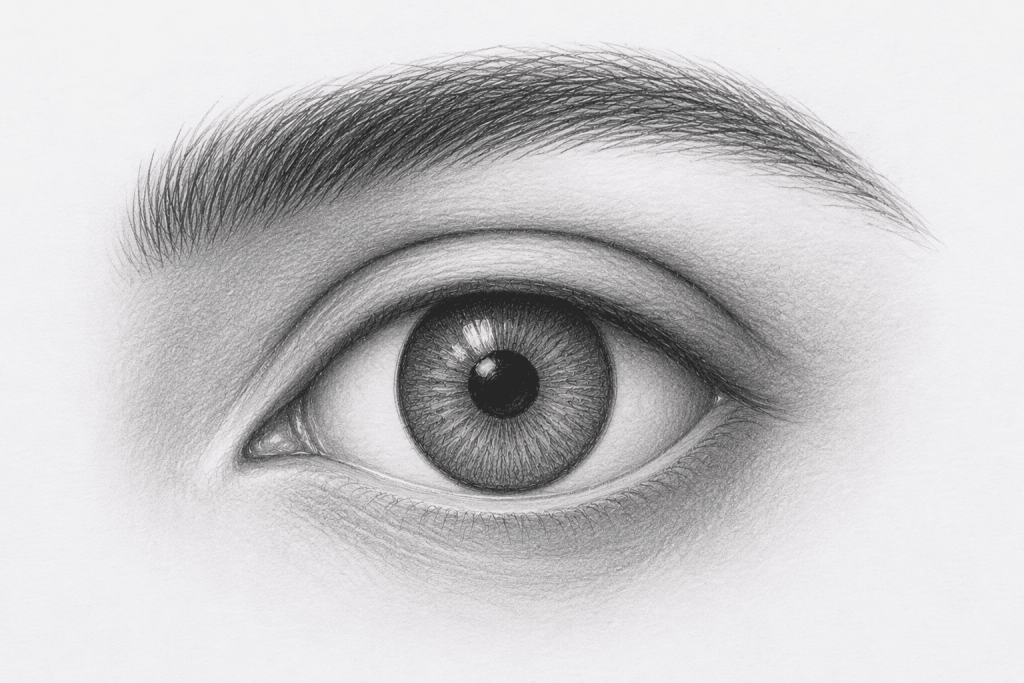
Step 2: Draw the Iris
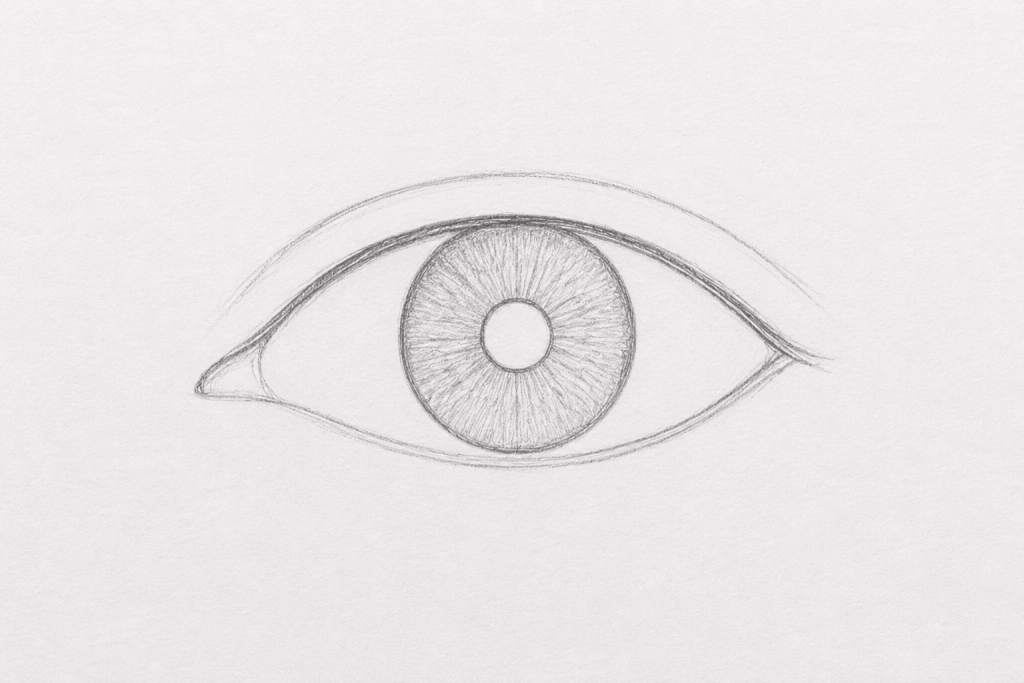
Inside the eye shape, draw a circle for the iris.
Remember:
- The iris is partially covered by the upper eyelid.
- Most people do not show the full iris.
This simple adjustment instantly makes drawings look more realistic.
Step 3: Add the Pupil
Draw a smaller circle in the center of the iris.
The pupil controls how much light enters the eye.
Keep it centered unless you’re drawing the eye looking in a specific direction.
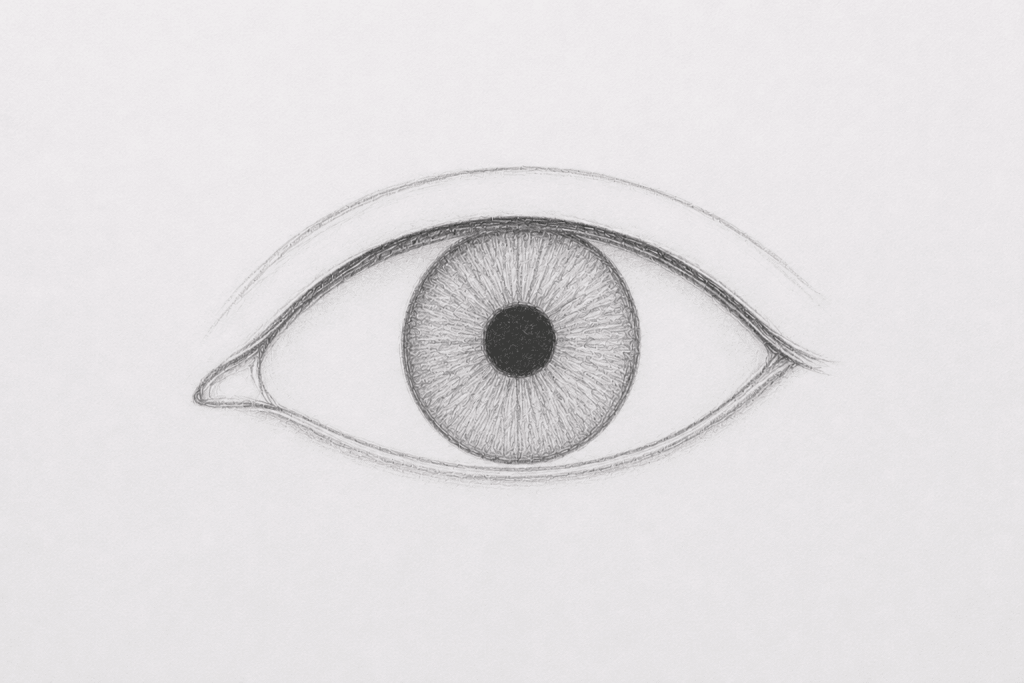
Step 4: Sketch the Eyelids
Now add thickness to the eyelids.
This is one of the biggest differences between beginner and advanced drawings.
Real eyelids are not flat lines.
They have visible thickness and wrap around the eyeball.
Adding this subtle detail creates depth.
Step 5: Add the Eyebrow
Lightly sketch the eyebrow above the eye.
Avoid drawing individual hairs immediately.
Instead:
- Draw the overall eyebrow shape first.
- Add hair texture later.
This creates a more natural appearance.
Step 6: Start Shading
Shading is where the eye begins to look realistic.
Focus on:
Darkest Areas
- Pupil
- Upper eyelid crease
- Eyelash roots
Mid-Tones
- Iris
- Eyelids
- Eye socket
Lightest Areas
- Reflections
- Highlights
- Lower eyelid shine
Build values gradually.
Avoid pressing too hard with your pencil.
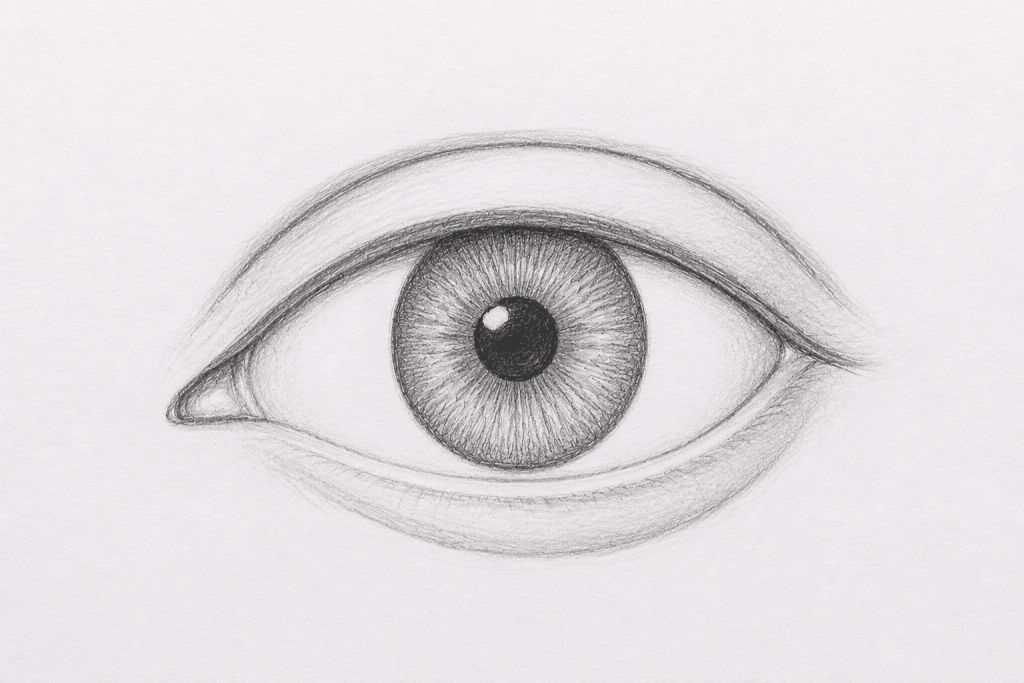
Step 7: Shade the Iris
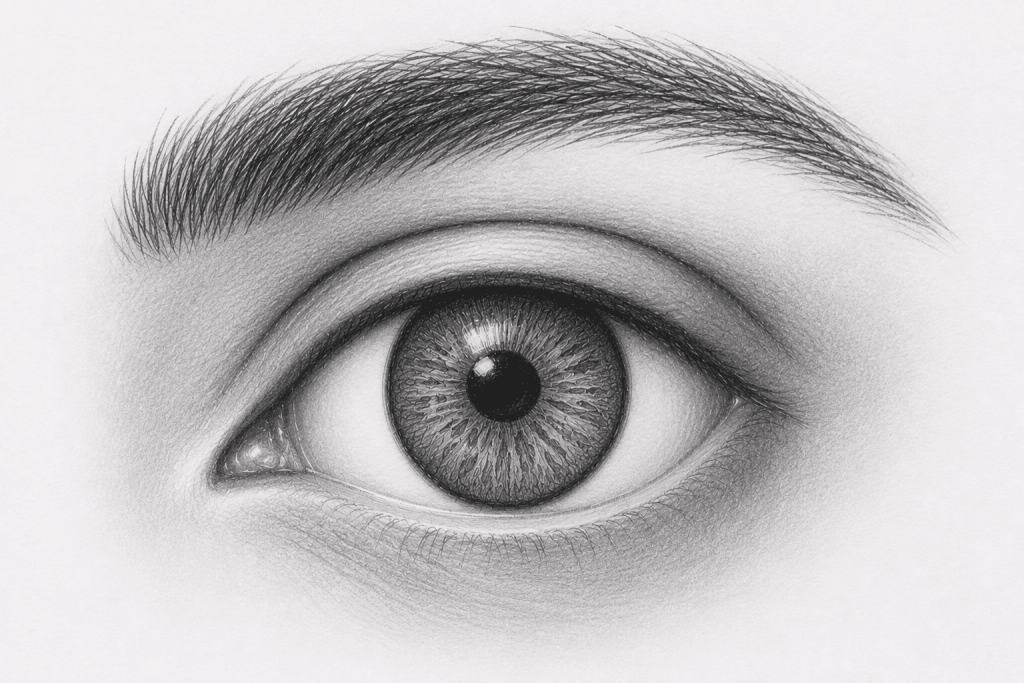
The iris isn’t one flat color.
It contains:
- Radial lines
- Texture
- Value changes
Usually:
- The upper iris is darker because it sits under the eyelid shadow.
- The lower iris receives more light.
This creates a natural three-dimensional effect.
Step 8: Add Eyelashes
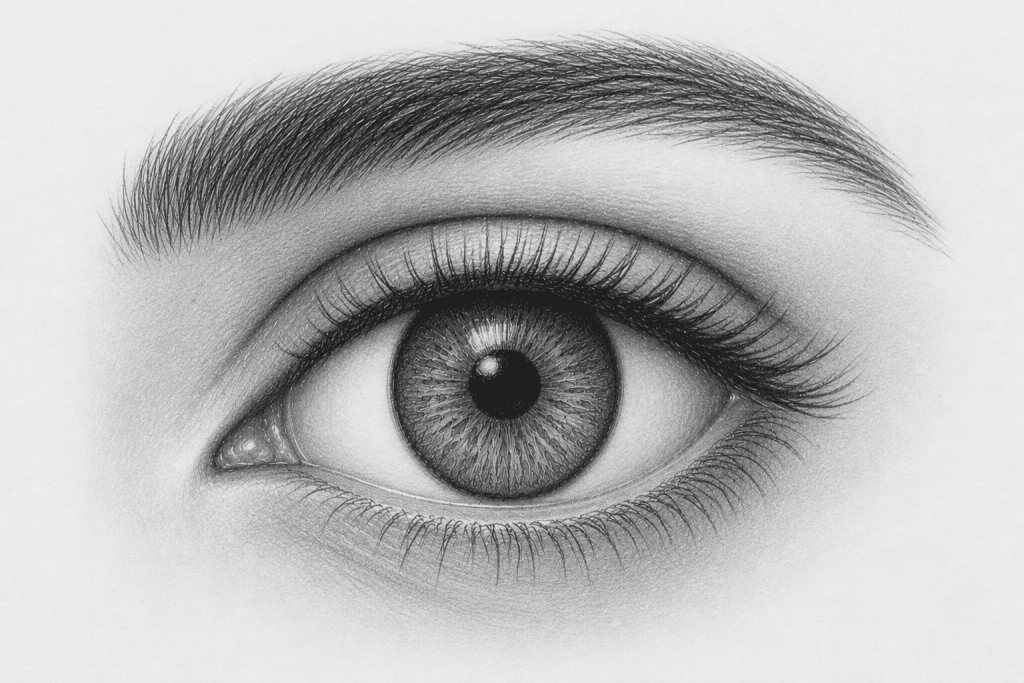
Many beginners draw eyelashes incorrectly.
Remember:
- Eyelashes grow in groups.
- They curve naturally.
- They vary in length.
Avoid drawing straight, identical lashes.
Natural variation creates realism.
Step 9: Add Highlights
Highlights bring the eye to life.
Leave small white areas untouched.
Common locations include:
- The cornea
- Upper iris
- Tear duct
Without highlights, eyes often appear dull and lifeless.
Common Mistakes When Drawing Eyes
Drawing Symmetrical Eye Shapes
Real eyes are asymmetrical.
Making the Iris Too Large
Oversized irises create a cartoon-like appearance.
Ignoring Eyelid Thickness
Thin eyelids make drawings look flat.
Drawing Every Eyelash
Group eyelashes together instead.
Overblending
Too much blending removes texture and realism.
Tips for Drawing Realistic Eyes
Study Real References
Photographs and life drawing improve observation skills.
Practice Different Angles
Draw eyes:
- Front view
- Side view
- Three-quarter view
Learn Basic Anatomy
Understanding structure improves accuracy.
Draw Daily
Even 10 minutes per day can dramatically improve your skills.
Frequently Asked Questions
Why do my eyes look flat?
Usually because there isn’t enough shading around the eyelids and eye socket.
Should I draw the eyeball first?
Most artists begin with the eyelids and visible structures before refining the eyeball.
How long does it take to learn drawing eyes?
Most beginners see noticeable improvement after several weeks of consistent practice.
What is the hardest part of drawing eyes?
Creating realistic shading and proper proportions.
Final Thoughts
Learning how to draw the eye is a skill that improves through observation and practice.
Instead of focusing on tiny details first, start with the overall structure. Build the eye from simple shapes, add accurate proportions, and gradually develop shading.
Remember that every professional artist once struggled with drawing eyes.
The difference is simple:
They kept practicing.
Grab your pencil, choose a reference photo, and draw another eye today. Every sketch teaches you something new.
Goals: How to Set Goals That Actually Work and Keep You Motivated 2026
``` ```